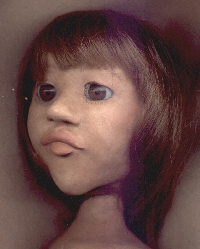
Work in process
If you want to know how such a doll comes to life, here is a short story. You can follow the steps and create your own doll. If there should be any questions, just email me and I'll try to help...
Material needed to modell a doll-head
1) a ball made of styrophor or pressed cotton wool,
2) glass or plastic eyes (flat or round),
3) polymercla
4) the innermost part of a small paper roll (used in desktop calculators)
The eyes
First thing is to set the eyes. You'll have to cut wholes into the ball when using the round eyes. For the flat eyes cover the ball with polyclay and set the eyes in place before the clay dried. At the beginning is could be a bit difficult to set the eyes correctly. As a helping line a kind of a reticule could be drawn on the ball...
The head
Both heads are now completly coverd with polyclay. You should take care that those faces don't get too rounded - except you want to do a „Full-Moon-Face“. Before starting to add the next layer of polyclay, you'll have to wet the area of the head you want to work on. That way the two layers will stick together far better. The eyes are to be covered partly by clay in order to create the eyelids. At that stage of working you add first layers of clay for eyebrows and cheeks.
Don't panic... even if the doll-to-be is now looking like an ugly kindred of ET ;)
Shape of face
The next step is to make the face. Nose, mouth, forehead (with a hint of eyebrows), cheeks and chin could be done in one session. But I find it better to do a few sessions, because the head could develope cracks when drying. This happens very often on bigger heads; that's the reason why the smaller head looks more like a face then the bigger one with green eyes.
Drying and grinding
When you've got the face and head ready as you want it to be, let it dry thoroughly. For going on with sculpting it is enough to let the coverlayer dry out. For grinding it will have to dry out for at least two days. So take a rubber crubber and grind the head until it is smooth all around. Take care, that you don't remove too much ;) It is possible, that now there will tiny holes or scratches show up. Take a small amount of the polyclay, fill these holes - let it dry - and grind again.
The ears
The next step is to form the ears. You need an oval shaped piece of the polyclay - about stamp size. Set it on the side of the head, the upper edge at the same level as the eyes. With a small tool form the inner and outer contures of the ear.
The body
Now the head is (nearly) done and you should see to get your doll a body. You can buy an already sewed -or even an already stuffed- dollbody, or sew the body yourself. This is the pattern I use. You can get your own pattern or email me if you want me to send this pattern as attached file.
The shoulder- and breastplate
The next step is to attach the shoulder- or breastplate. In my opinion it's the easiest way to set the head onto the body and then sculpting the breastplate. That way the breastplate won't get too small or too big. The plate should get small wholes on the front and the back, to enable better fixing to the body.
The hands
Now the hands and feet... I'm sorry, I cannot provide pictures of work in process, cause the wet polyclay would ruin my scanner. So you see here the finished product. At the upper end of the wrist you should see that you get a slit to enable fixing of the hand to the arm.
The feet
The feet will have to be done according to the hands...
The Makeup
Now we are at the most difficult part, at least for me... the painting of eyebrows and lower lashes. I use crayons for aquarell painting. You can get them in a wide range of colours. Before starting to paint, you should know what wig the doll will get, to make sure the eyebrows get about the same colour. If you cannot get exactly the same colour in one crayon, just take two or even three to get a better matching.

Ready
Now you'll have to varnish head, hands and feet twice. Then you can glue on the wig. In case your doll should have frackles, these will have to be painted before varnishing. To give the doll more expression, I put make-up onto the dolls face. I use my own make-up, but the doll will get a lot more colour then me normaly... The rouge has to be applied not only on the cheeks, it has to be (really a little) bit on to the forehead, chin and tip of the nose. After apllying the make-up you'll have to varnish the face again to keep the make-up fixed. Either you use a spray-varnish or the same as before - but very,very carefully.